


Loadout: 5 Days, 50 Miles, Rim to Rim to Rim in February
Last month, I and my good friend/fellow YouTube Backpacking Guru embarked on a 5-day, 50-mile, winter trudge across the Grand Canyon. Now, it would be an understatement to say this Grand Canyon winter backpacking trip did not go as planned. In fact, it turned out to be an epic hike that nearly killed Dan Becker.
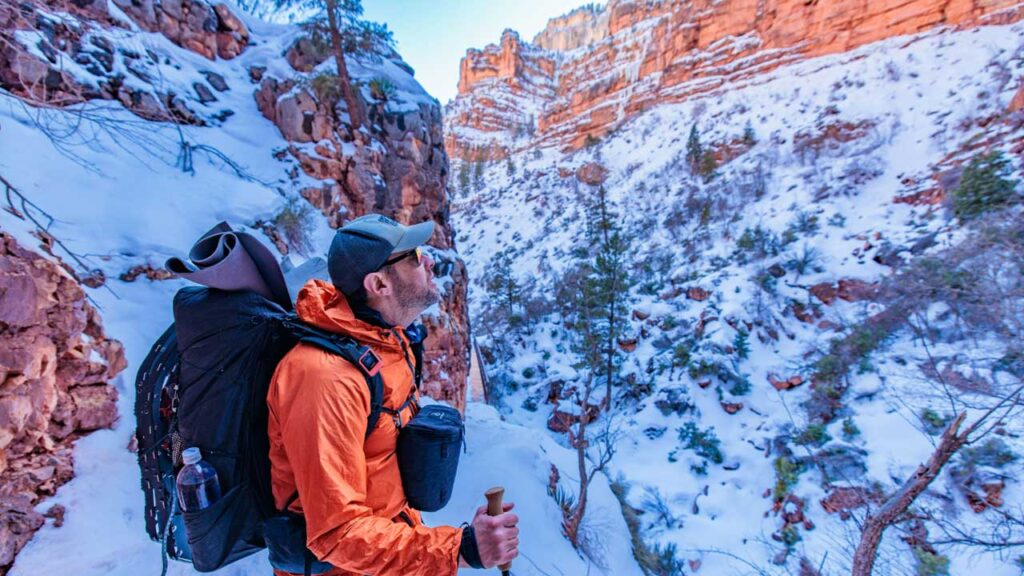
But despite the challenges and the eventual rescue operation on the north side of the canyon, I dusted myself off, and returned on foot (and snowshoes) from whence I came. The comment section on the videos we both put out were flooded with questions and kind words regarding the incident, but I did also see some curiosity about the Rim to Rim to Rim trek itself.
The Right Gear for Grand Canyon Winter Camping
This is a bucket-list endurance challenge that many athletes take on each year. It usually just ends in a mix of plain old exhaustion and elation (not rhabdomyolysis). Success, apparently, requires a bit of luck. Also the tried and true act of preparation matters (something that is at least within the backpacker's realm of control).
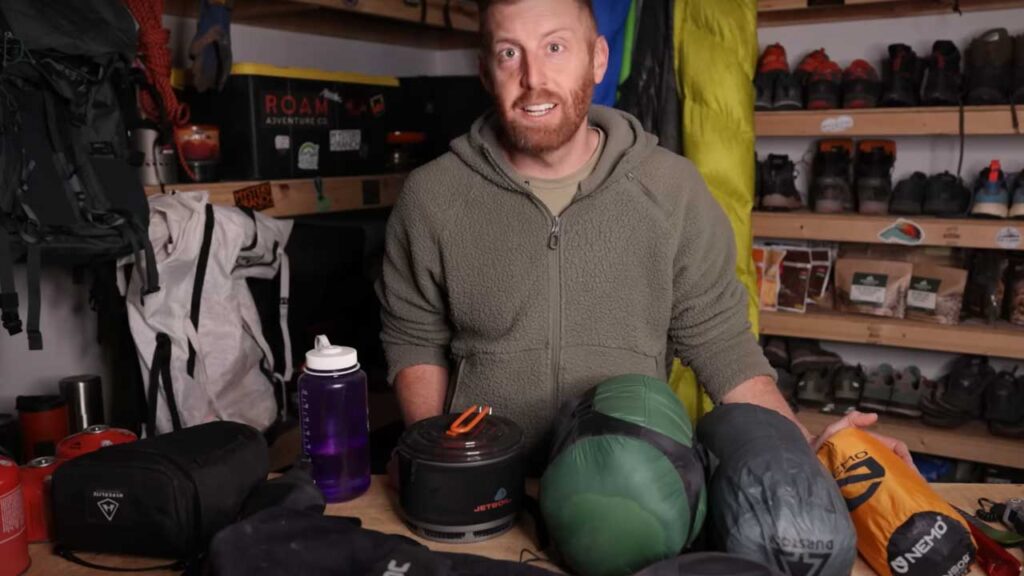
I'm going to walk you through the contents of my 52-pound pack. In order to give you an idea of what this unique hike entails. Though I pushed on for the return journey. Hiking from one end to the other and then shuttling back is still one heck of an impressive trip. Whatever you're more drawn to, know that the gear situation will be very similar. Save for the extra food needed, for the additional days planned.
For Grand Canyon winter backpacking, having the right gear is key.

Mystery Ranch Bridger 55
All the gear I'll be mentioning today fit into my rockin' new Mystery Ranch Bridger 55-Liter backpack. Its perfect for Grand Canyon winter backpacking. They have been a welcomed patron here at BackpackingTV/In4Adventure.com for a long time. Mystery Ranch makes amazing backpacks that are not only wicked durable, but the most drop-dead comfortable packs on the market.
Carrying 52 pounds of gear for 50 steep winter miles was asking a lot from my pack. I'm so happy to report that I never had sore shoulders, or back pain. Or any of those things you might expect from hauling long days on a trek like the Rim to Rim to Rim. So if you are looking for a great day-hiking backpack, or something to check off those multi-day adventures with, head over to mysteryranch.com to check out the Bridger 55 or 65.
My Sleep System for the Rim to Rim
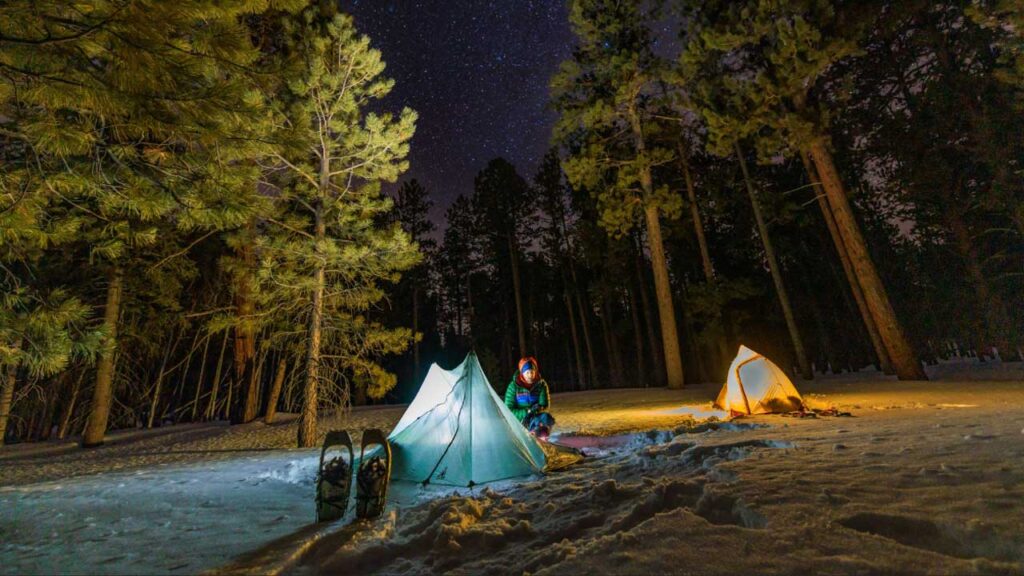
I recently did a Fresh Gear Friday: Lightweight Backpacking Tent & New Gear of the Durston X-Mid Pro 1. I loved it after a basic overnight test, and I love it even more now after bringing it into and out of the Grand Canyon for 5 days. On top of being surprisingly effective in cold and windy conditions, this tent is super lightweight (16 ounces, or 17 if you include the MSR Blizzard Snow Stakes I packed), which saved my shoulders a lot of extra grief.
Lightweight Tent
Some people critique the “1-pound tent” claim by pointing out that trekking poles are required to set it up, but those are something I needed to bring along anyway. When logging huge ascents and descents, especially in the Grand Canyon when they come at you in massive doses of one or the other (variation can help spare the knees), then trekking poles are a huge asset.
If you add in significant levels of snow, then they become practically mandatory. So as far as I was concerned, there's no way I could have done any better than the Durston X-Mid Pro 1 in terms of the weight/functionality balance.
Sleeping Bags, Pads at 14 Degrees
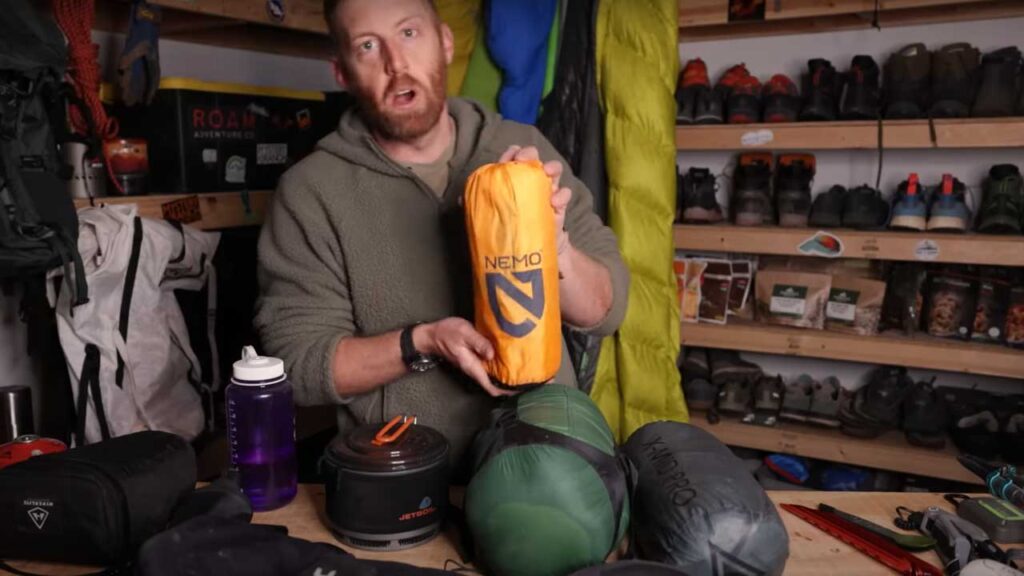
For my insulated sleeping pad, I opted to go with the Nemo Tensor (4.2 R-Value). This is another insanely packable piece of gear (you shall notice a trend emerge here pretty quickly!) – probably the lightest I would have felt comfortable going with, given the fact that I knew I would be sleeping on top of snow for a few nights. For me, it got the job done. But unfortunately for cameraman-extraordinaire, Jake, though he had the exact same air mattress, it failed in a way that was not repairable in the field.
To cap it all off, I cozied up in my Therm-a-Rest Parsec 0-degree sleeping bag. The coldest it got on this trip was maybe 14 or so degrees (Fahrenheit), and so I was well-protected. Always remember that the advertised tolerance does not necessarily reflect a reasonable comfort range. So a 0-degree bag on a 14-degree night, combined with a sleeping pad with a substantial R-Value, was exactly what I needed to keep my body recharging night after night.
Grand Canyon Rim to Rim Winter Hike
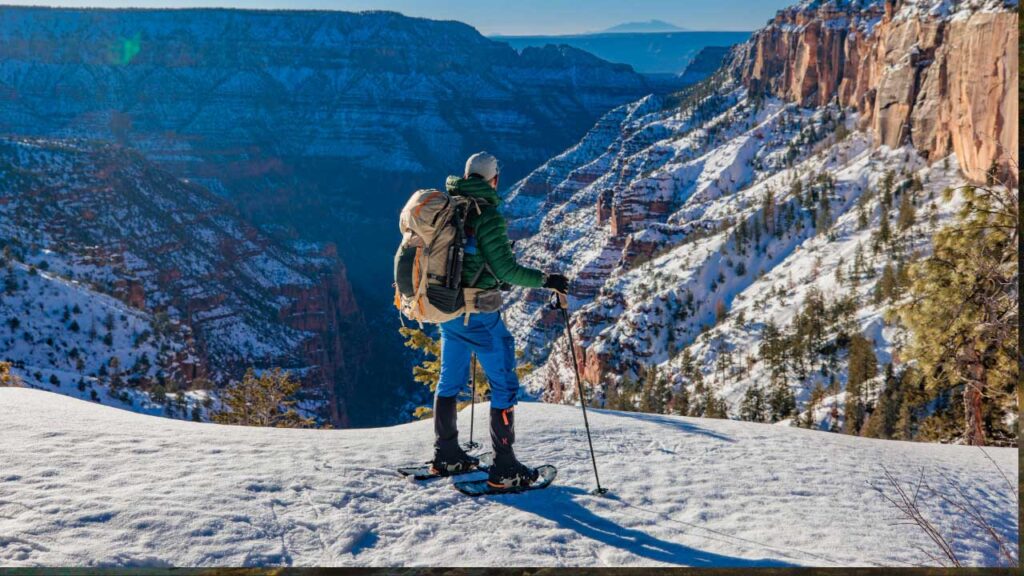
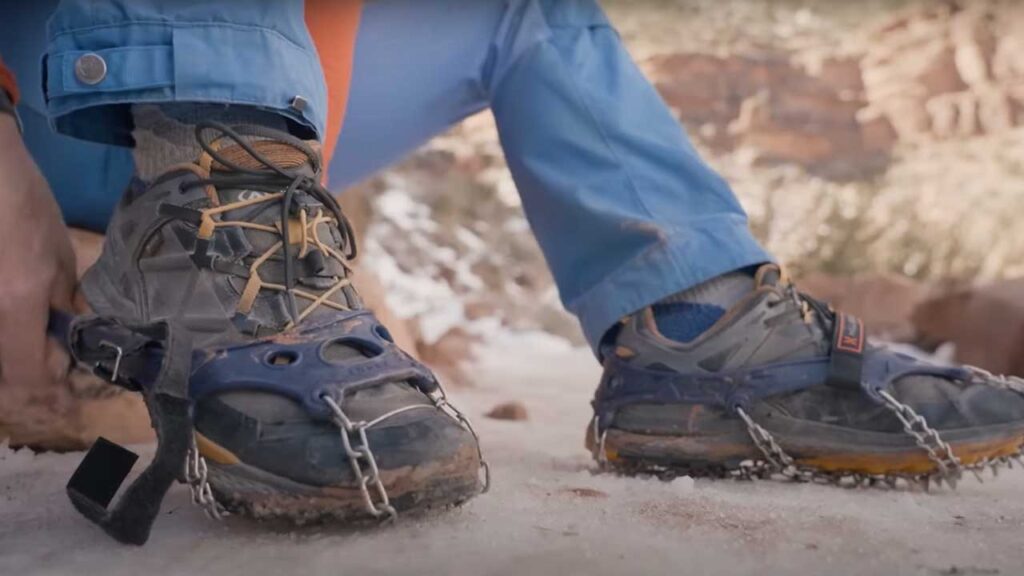
There will be additional equipment requirements to a winter hike. When I went in February, there was a lot of snow and ice throughout the trail (especially in the shade or near dripping water on the North side). So having traction spikes or crampons is an absolute must. I would not have felt comfortable without the added grip.
Personally, I went with the Hillsound Trail Crampon and was very pleased with their performance. And because the snow could get quite thick in some areas, I also packed a pair of Hillsound Gaiters, which are my favorite gaiters I've ever used.
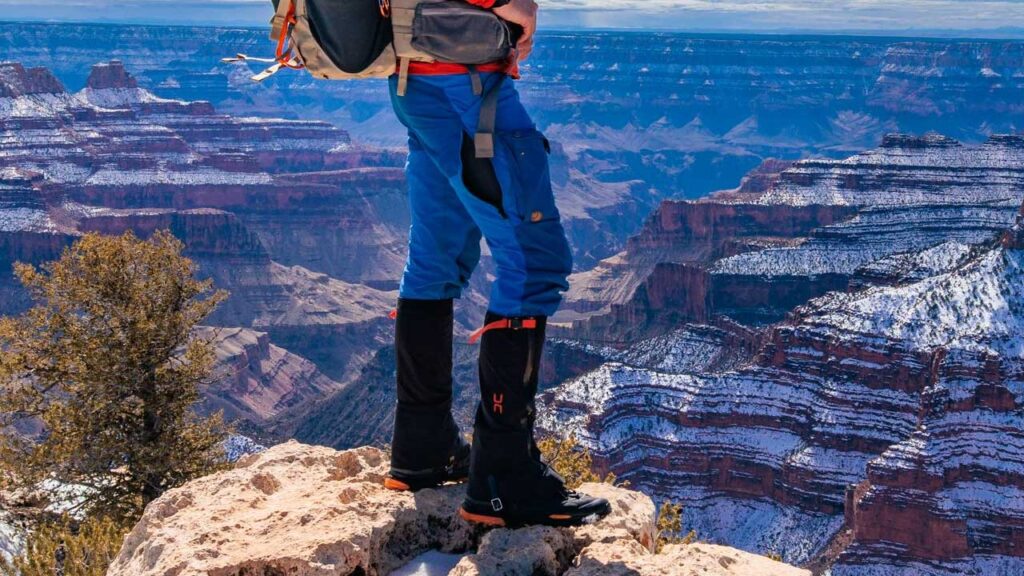
I like how they zip up, they're easy to connect, and they keep my shins dry. What else could the heart of a man desire? Maybe a lighter set up – this pair or pairs added at least a pound and a half (and every ounce counts) – but this was a demanding winter trip, so some concessions simply had to be made.
Low Cut vs High Cut Boots
In terms of footwear, I went with a slightly unorthodox combo, or trifecta, actually. Dan and I elected to bring snowshoes, which we had to carry for 18 miles before they came into play (note: we went from South to North), but we were glad to have had them when push finally came to shove.
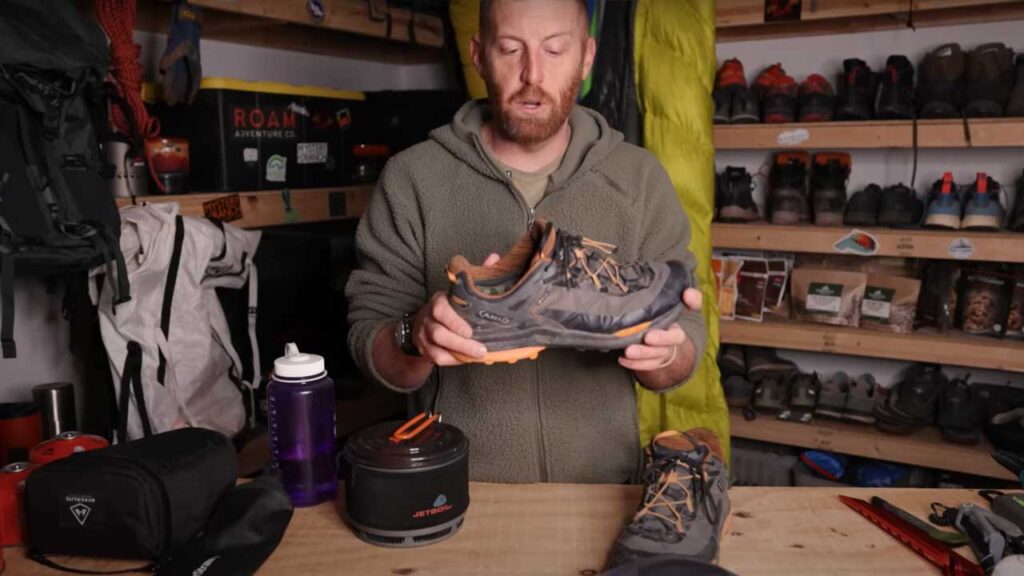
My main kicks were a low-cut Gore Tex hiking boot (AKU's Rocket DFS GTX), which I combined with a pair of Superfeet insoles to boost the cushioning and support. I passed on the classic, rugged hiking boots in an effort to keep my feet happy and my legs charging on, day after day.
Bister Management
I did end up getting a few blisters, but I chalk that up to the exceptional weight and tough, unstable conditions. I've logged a lot of miles in these shoes lately (even in the jungles of Peru) and have had minimal issues. So overall, I gave myself a pat on the back for my entire arrangement south of the knee.
Food Management in the Grand Canyon
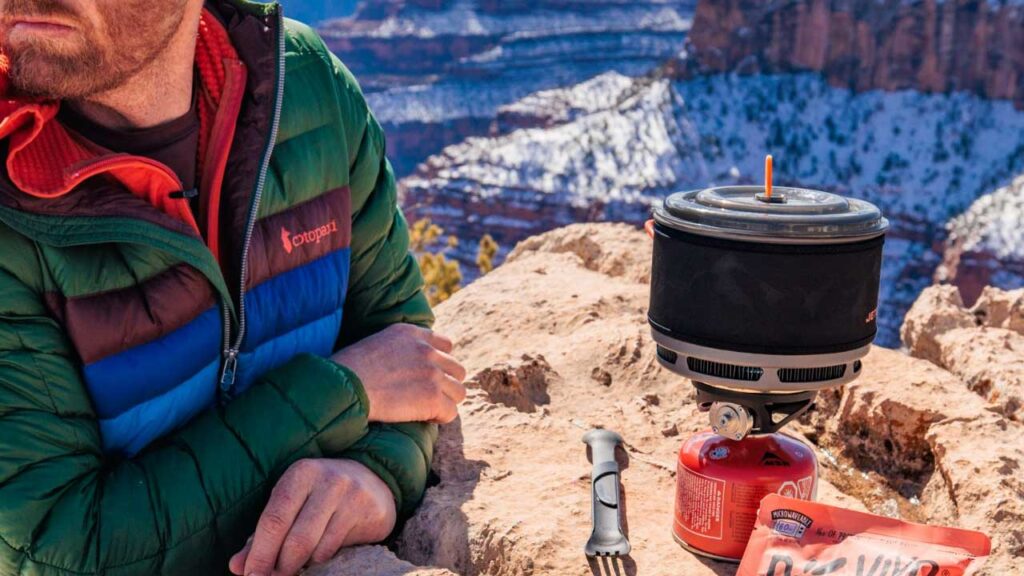
I also had to make careful considerations in regards to my cook set, in order to accommodate the winter climate. For example, I chose the Jetboil Fluxring Pot and MSR fuel, which I combined with the Jetboil Minimo (just the stove part), because I needed a big cooking pot and efficient heat transfer in order to regularly melt snow.
Water Source Management in the Grand Canyon
Snow was essentially our only source of water for half of the trek, so I needed something that gave me good bang for my buck (even though it was bulkier and heavier than I would ideally have liked). Dan had a lighter setup, but it wasn't as efficient (i.e. much longer melting time).
On the south side of the canyon, where there was more flowing water, I used the Lifestraw Peak Squeeze Water filter to nix any potential impurities. I also brought along a standard Nalgene, which doubled as a hot water bottle at night.
Hot tip: Fill your Nalgene with boiling water before crawling in your sleeping bag and you'll not only have a warm cuddle buddy, but also perfectly good, cooled-off drinking water come morning.
And finally, because I felt like the de facto team leader for my video crew, I carried Sea to Summit Watercell X, to make sure that there was always sufficient hydration on hand. I didn't ever fill it all the way, but between that and my Nalgene, I typically had 3 liters strapped to my back at any given time. Having the perfect water set up keeps Grand Canyon winter backpacking safe.
Cooking on a Multi-day Backpacking Trip
I wish I could say I nailed everything to do with the entire cooking/water-making business, but I ended up packing waaaaaay too much fuel. As it turned out, I ended up lugging around about twice what we actually needed. I just didn't want to skimp and leave my crew without water. You live and you learn!

Food planning for a 5-day backpacking trip
Under normal circumstances, I'm a proponent of cooking delicious backpacking meals, with some assists from your preferred dehydrated/freeze-dried preparations. However, given the demands of hiking the Grand Canyon's Rim to Rim to Rim, and the extra weight necessary for doing so in the wintertime, I reverted back to things I knew were highly packable and nutrient-dense.
Most of my cooked meals across this 5-day adventure were taken care of by Pinnacle Foods The Italian sausage pasta dish being my absolute favorite freeze-dried dinner across any brand I've ever tried (and I've dabbled far and wide over the years). BeanVivo Three Bean Chili kept things deliciously simple on what was an incredible meal at rim-top! To bridge the gap in between stove time, I ate a lot of dried mangos and apricots, almonds, bars, etc.
To claw back some weight savings, I also went with the UCO collapsible camp cup and the highly versatile UCO Spork.
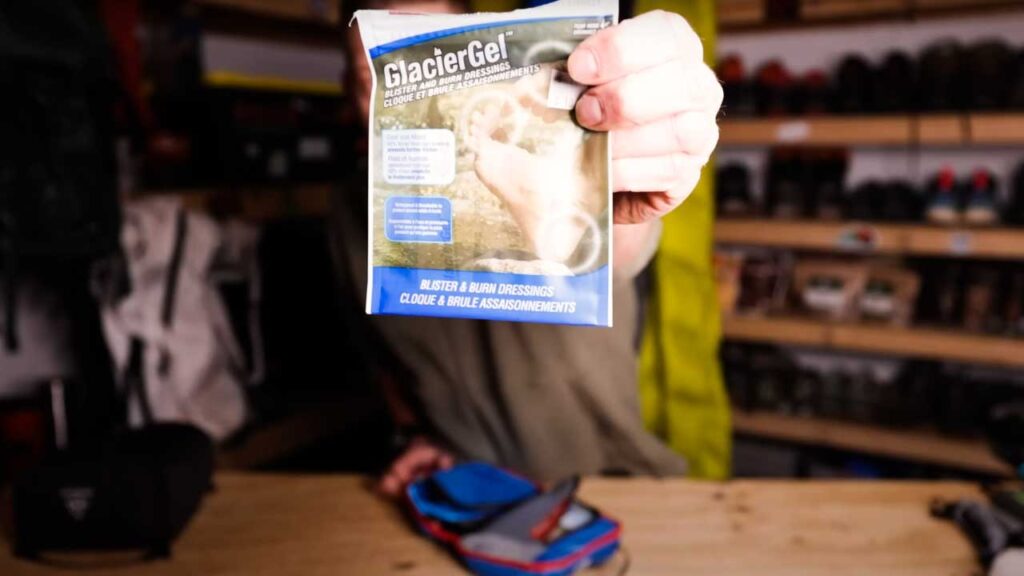
Hiking emergency kit
Along with my Adventure Medical Kits first aid, I stuffed in some Glacier Gel to fix up my blisters (in an oh so soothing way), a general patch kit (good for managing minor gear maladies), my trustee Vosteed Nightshade pocket knife (always seems to come in handy), and my Zoleo satellite communicator (good for firing off check-in texts when times are good, and then you never know when you'll have a harrowing Rescue in the Grand Canyon!).
Headlamps With Longevity are Key
Because of our unexpectedly long days trying to grind out the winter miles, I was thankful to have a more robust headlamp than I would normally pack simply for emergencies, or for bumming around camp after dark. The Ledlenser Neo 5R Headlamp ups the game with a heftier battery pack, which extends the duration and intensity of that beautiful guiding beam.
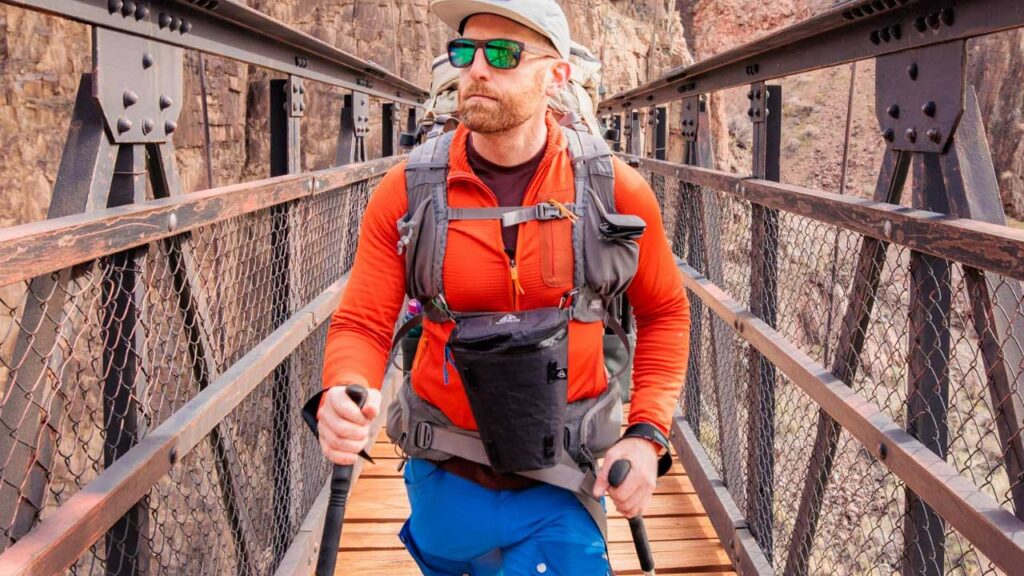
What do you wear to hike the Grand Canyon's rim to rim?
I'll start with the nicknacks that served me well. Wiley X, sponsor of my Epic Trails series, makes my favorite pair of sunglasses, the WX Ovation. When hiking in and around the Grand Canyon, there are unbelievably exposed sections. Doing the Rim to Rim in the winter made eye protection even more important, since those UV rays bounce off all the fresh white snow and directly into your poor eyeballs.
I was also glad to have my Hestra Bike Ergo Grip Tactility Glove, for the task at hand. They cut the wind, let me get touchy-feely with the canyon walls, and they kept my hands warm. Another tiny consideration that is easy to overlook is the choice of belt. I like those stretchy ones that arcade ranger make because they move with the body and don't cause pressure points over time.
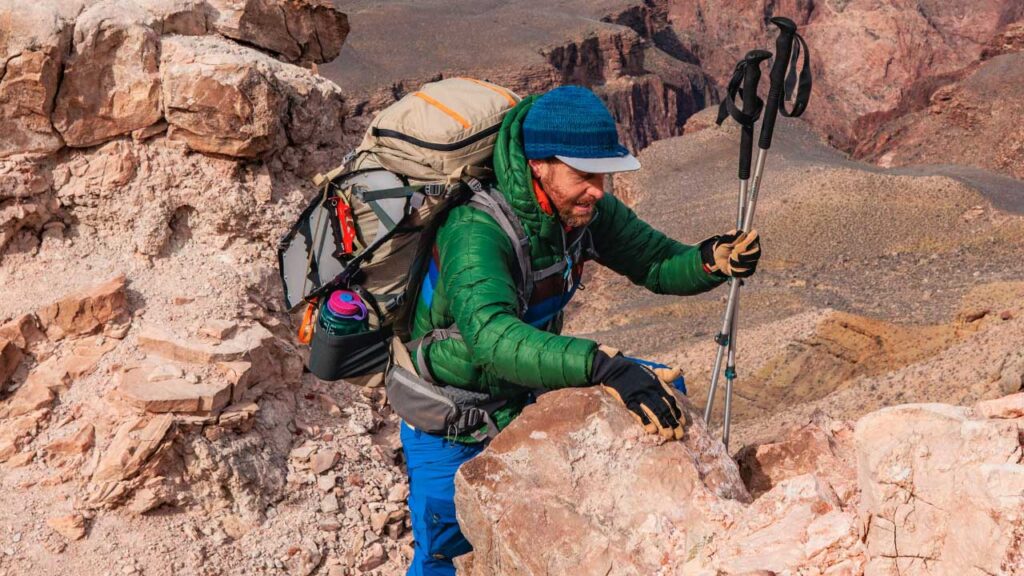
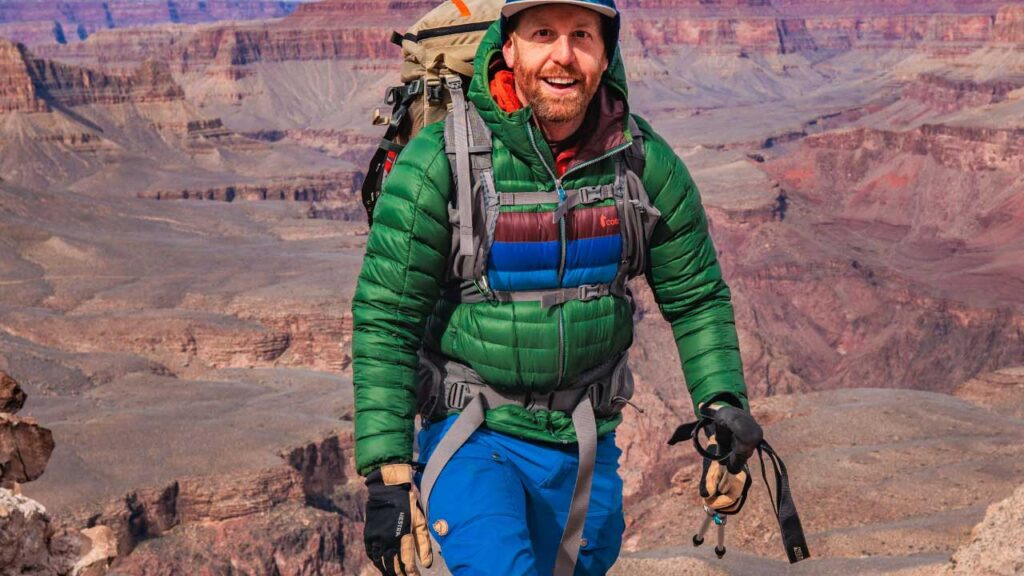
Layering for Long Epic Grand Canyon Hikes
For layering on top, Cotopaxi had me locked and loaded. I started off with the moisture-wicking Liso Baselayer, stacked it up with the Otero Fleece full-zip hoody, and sealed in the warmth with the Fuego Hooded Down Jacket. The Fuego isn't the lightest down jacket on the market, but it is undeniably warm and competitively-priced – so that will please lots of backpackers out there.
Downstairs, I sported Fjallraven's Keb Trousers, a thick and warm, yet well-ventilated pant perfect for the tough conditions. I made due nicely with just the trousers while on the move, and then when I got into camp, I threw on some long johns. A slick wool beanie is also a must for me when hiking and/or camping in cooler conditions.
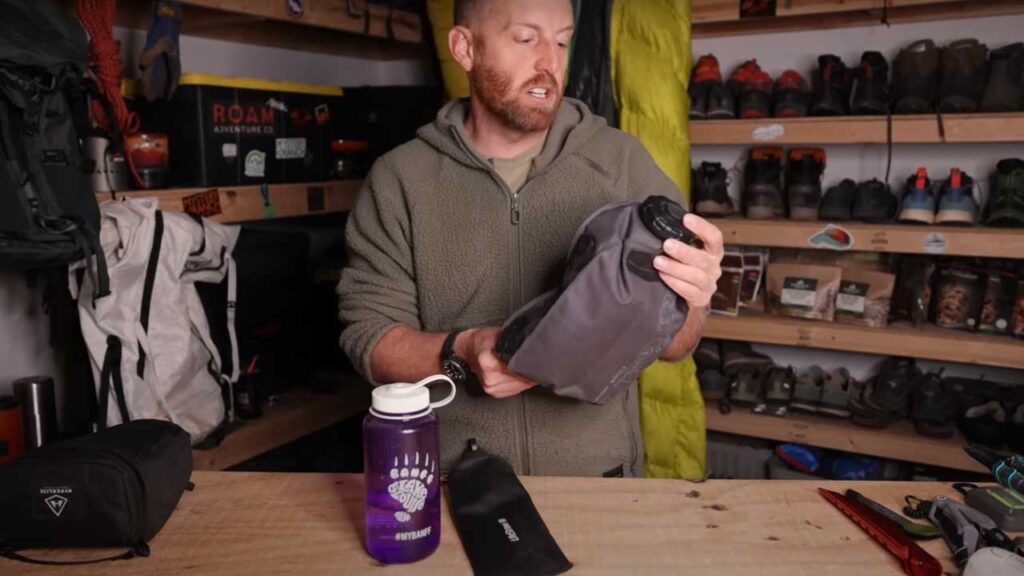
How do you carry your camera backpacking?
I've made a habit of using the Hillsound Packstack Pro as my mock camera gear case. It's waterproof, lightweight, and once I stuff a bunch of clothes in there, there's plenty of padding to protect my baby. Getting all of the bare essentials inside of a backpack can be enough of a tetris game as is, without having to worry about additional equipment. So this is a nice two birds, one stone method for me.
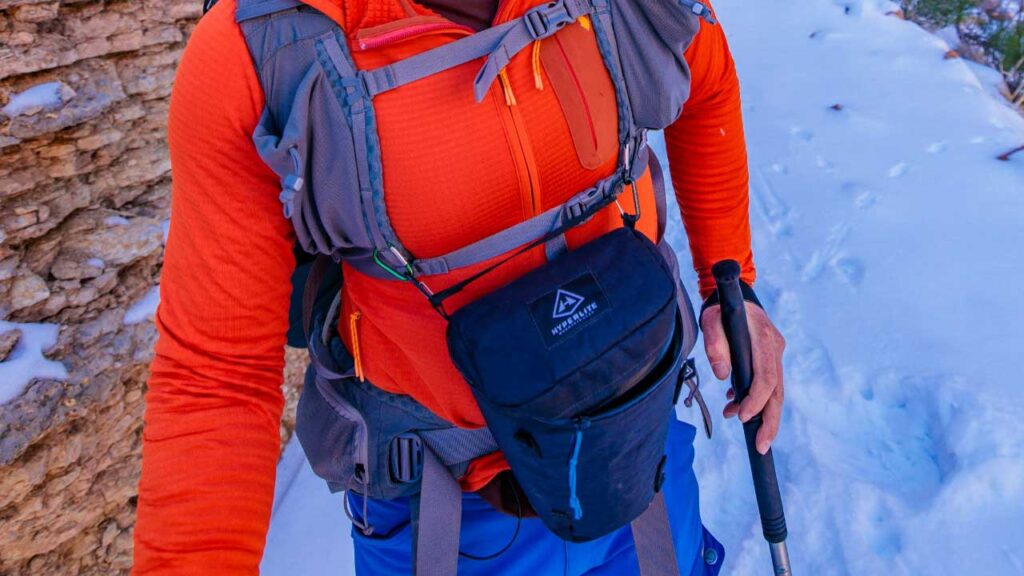
Backpacking Storage
This Packstack is all I need for storage, but for taking pictures on the fly, I've been digging the Hyperlite Mountain Gear camera pod. Keeping my camera around my neck, which this little guy is meant for, leads me to take significantly more shots than if I had to pause, take off my backpack, and rummage through some gear. Plus, by that point, interesting wildlife may have scurried off, or a cloud may have obscured that perfect but fleeting lighting.
Weight Management Lessons Learned
So that's the majority of the loadout I used for tackling the Grand Canyon's infamous Rim to Rim to Rim hike. Despite the unusual weight, I was very happy with my packing list, and how everything performed. With that said, I also learned a few valuable lessons. I definitely carried too much fuel, probably carried too much water, and even though I love my Grand Trunk Compass 360 Stool, I could have left it at home because all the Grand Canyon campsites have picnic tables. Oops.
In Conclusion
I hope you enjoyed this article and are looking forward to hiking one of America's most iconic formations. Don't be deterred by Dan's scare. He lived to fight another day, and we both have come to realize what a freak incident that was, and how it can be avoided in the future.

Gear used in this review includes:
Backpack: Mystery Ranch Bridger 55
Tent: Durston X-Mid Pro 1
Sleeping Gear: Therm-a-Rest Parsec 0-degree sleeping bag, Nemo Tensor mat, Sea to Summit Aeros Down Pillow
Other Camping Gear: Sea to Summit Aeros Down Pillow, MSR Blizzard Snow Stakes, Adventure Medical Kits first aid
Top Clothing Layers: Cotopaxi Baselayer, Cotopaxi Otero midlayer, Cotopaxi Fuego Hoodie, Hestra Bike Ergo Grip Tactility Glove, Arcade Hiking Belt
Footwear: AKU's Rocket DFS GTX, Glacier Gel blister care
Camp Stool: Grand Trunk’s Compass 360 Degree Stool
Hiking Gear: Komperdell Explorer Contour trekking poles, Hillsound Trail Crampon, Hillsound Gaiters, MSR snowshoes, Superfeet Insoles
Camp Kitchen: Jetboil Fluxring Pot, Jetboil Minimo, MSR fuel, UCO collapsible camp cup, UCO Spork, Vosteed Nightshade pocket knife
Food: Pinnacle Foods backpacking meals, Beanvivo meals
Water Management: Lifestraw Peak Squeeze Water filter, Nalgene Water bottle, Sea to Summit Watercell X
Storage: Matador Flatpak drybag, Hillsound Packstack Pro, Hyperlite Mountain Gear camera pod
Electronics: Zoleo Satellite Communicator, Ledlenser Neo 5R Headlamp
Sunglasses: Wiley X
Train hard, pack smart, maybe wait for the fair-weather season, and you'll be all set! For more gear reviews and wild adventures, head on over to BackpackingTV.


