


Hey guys. Today I’ll be walking you all through the YakAttack BlackPak Pro Assembly. The BlackPak Pro is available in three sizes. There’s a 13 x 13-inch model, a 13 x 16-inch model like the one I’ll be assembling today, and a big 16 x 16-inch version.
On the box it says that the BlackPak Pro is built for life. It also comes with a Lifetime Guarantee. Anytime I’ve ever had an issue with a YakAttack product they’ve replaced it, no questions asked. So that’s really awesome.
Another thing I like is that the BlackPak Pro is fully customizable and features strong, lightweight construction. This particular model also comes with four rod tubes.
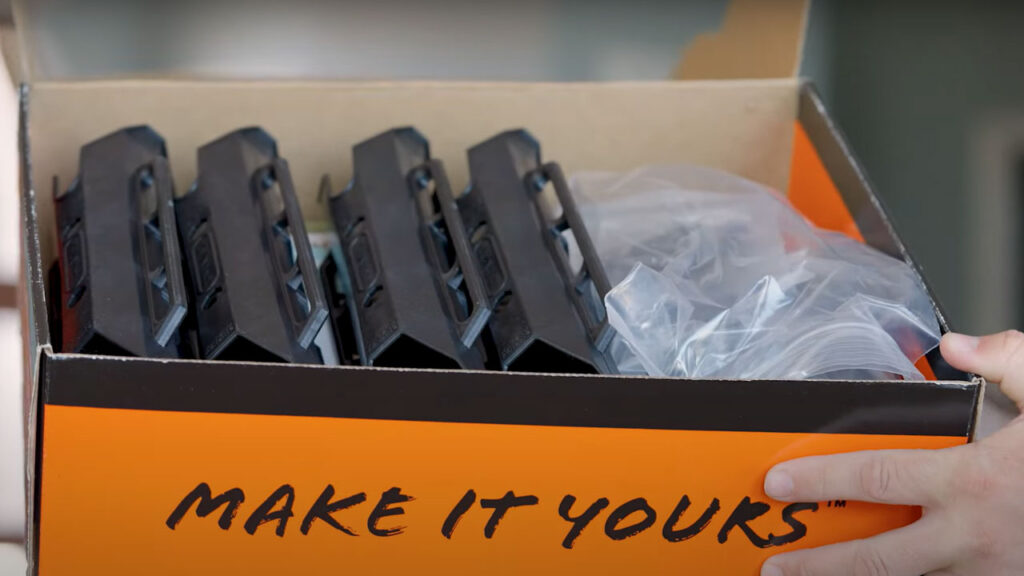
Unboxing the YakAttack BlackPak Pro
I'll start by opening the box and taking a look at what’s inside.
Today I’m putting together an olive green BlackPak Pro. This was a special edition color for the fall of 2022. Other than that, it’s identical to the standard 13 x 16-inch model.
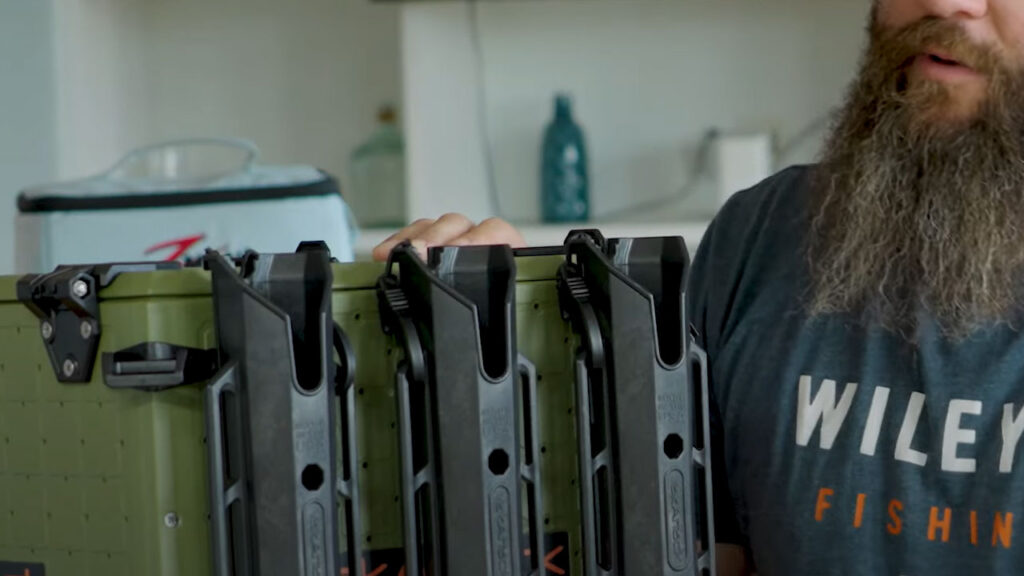
The four rod tubes are right on top inside the box. I’m just going to set those aside for now while I look at the first page of the instructions.
Step 1 – Connect Tethers to the Tether Tubes
The first step is connecting the tethers to the tether tubes.
For this I'll use Kit E. It's the only kit with a bungee in it.
To start, I’ll tie an overhand knot in the end of the bungee.
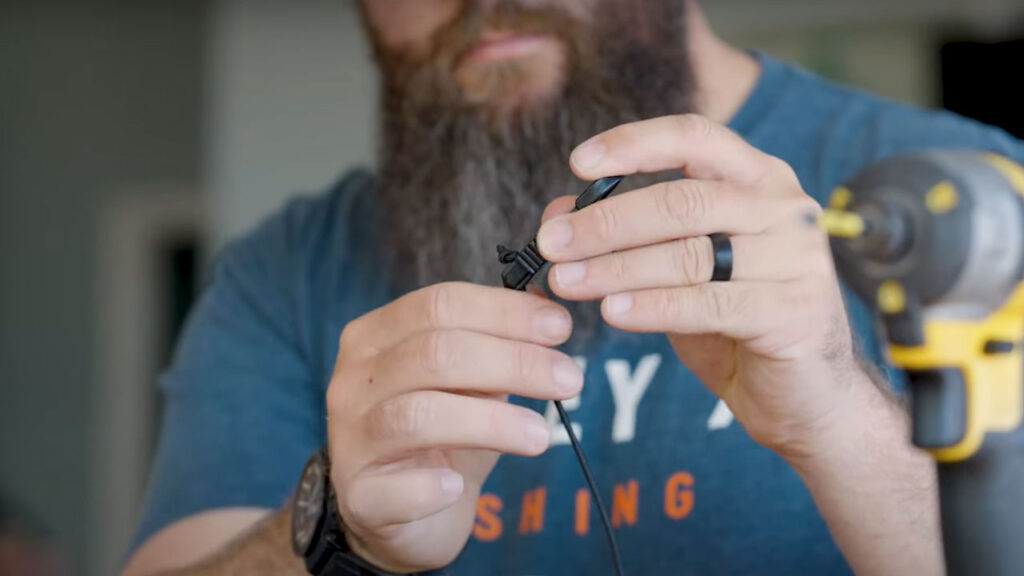
Next, I’ll feed that through one of the hooks.
You’ll see a box or opening on one side of the bottom of the hook. Make sure to feed the line through this side. It's the side that's completely closed on all four sides.
After tying the knot and passing the line through the square opening on the hook, I'll tie another overhand knot on the other end of the bungee.
Now I’ll pass this end through the opening in the top of the rod tube.
Next, I’ll pull it tight and set the line where it’s going to rest on the rod tube.
Yakattack BlackPak Pro Installation: The Rod Tube Addendum
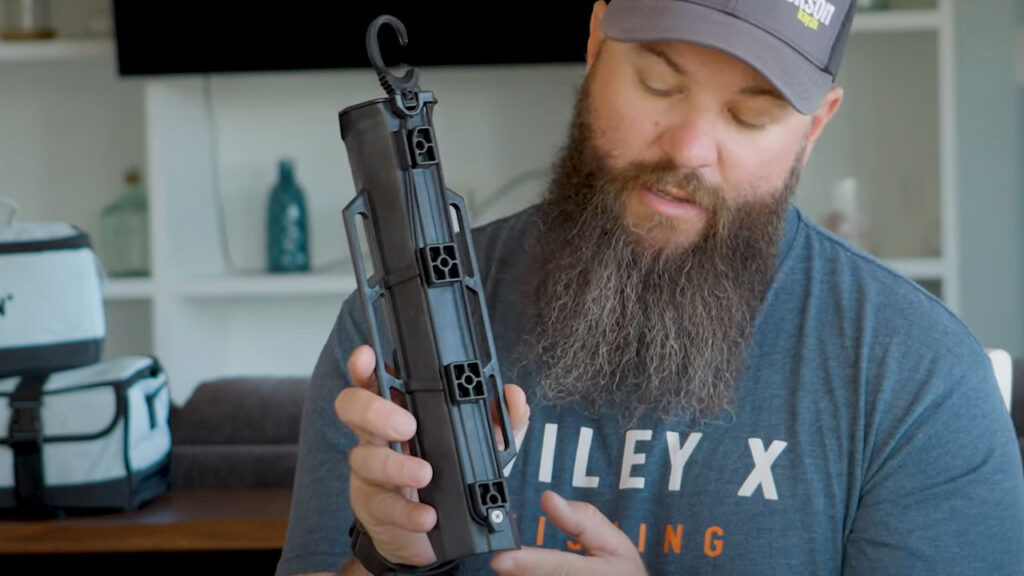
For example, I prefer to push the bungee through the end of the rod tube before tying the knot on the end. This makes it a little easier to pass the line through. Then I tie the knot after I've done that.
Another thing I noticed is that the instructions have an addendum explaining the rod tubes in detail. Make sure you dig those out at this point!
This step is actually in the instructions. You just wrap it around the bottom, pull it tight past the bungee through the opening, and let the knot tuck into the hole provided for it.
So now the bungee is wrapped around the bottom, but there's nothing to retain it.
Again, I pulled the four small screws out of Kit E. This is the kit for putting the rod tethers on the tether tubes.
These four screws will be used to install this piece so you just put it on the bottom here.
I’m going to use a screwdriver for this because it's a short screw. However, I'll use the drill in the following steps. If you use a drill, just be careful not strip things out when you’re tightening everything down.
Now all you have to do is repeat this process with the rest of the rod tubes.
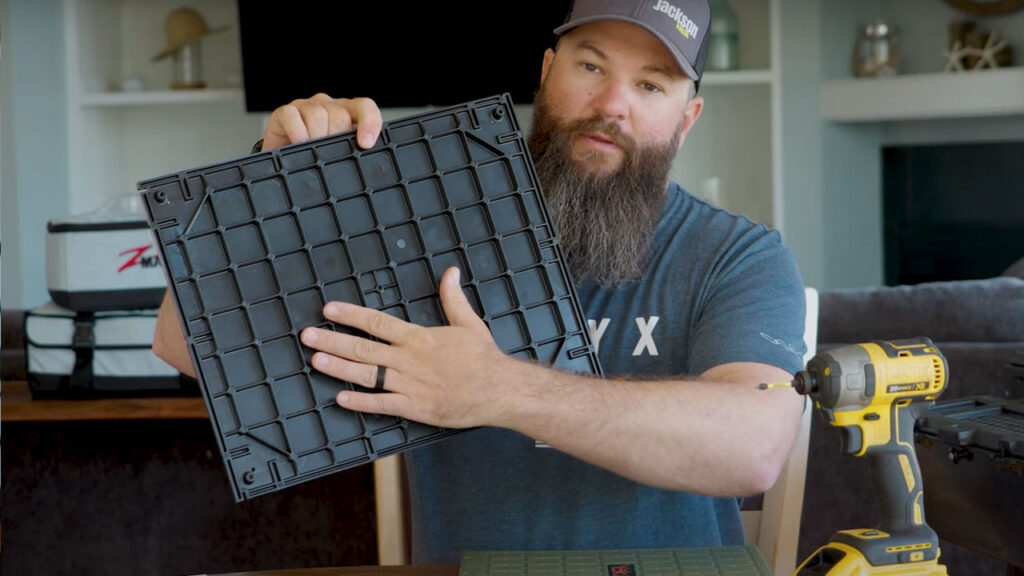
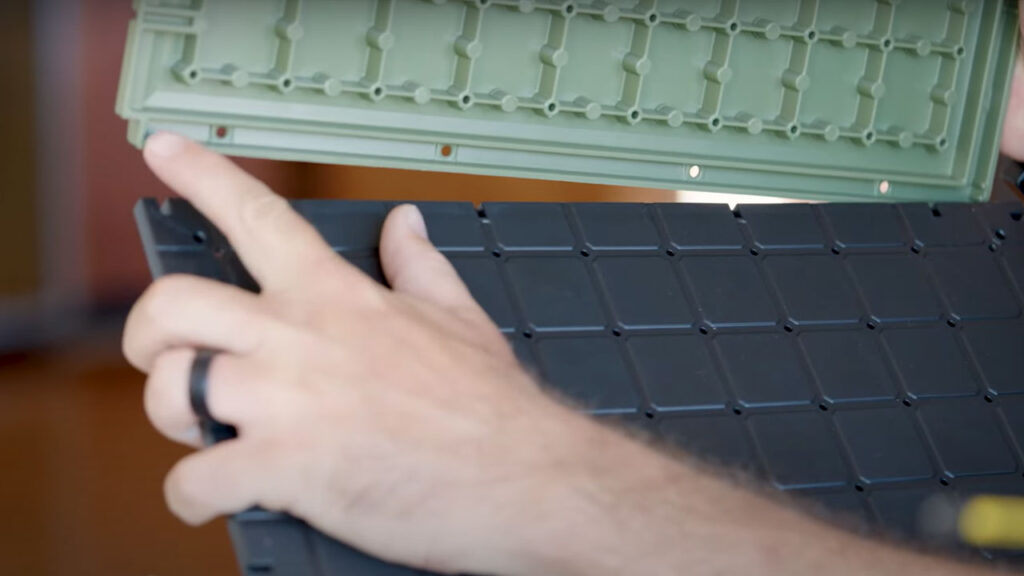
Step 2 – Fasten the First Side Panel to the Bottom
Now that the tether tubes are finished I'll fasten the panels together.
For this I'll need the four side panels and the bottom panel.
If you’ll be using a power drill make sure it has variable speed and torque settings.
This will allow you to slow the speed and put the torque at the lowest setting. You’ll be screwing into plastic, so this will prevent you from stripping everything out.
The underside of the bottom panel is corrugated whereas the top is flat. Before starting, make sure the corrugated side is facing down.
The flat side will be the top of the floor inside the box. This is where you'll set your gear and tackle.
To fit the bottom and side panels together, just line everything up with the convenient slots at the bottom.
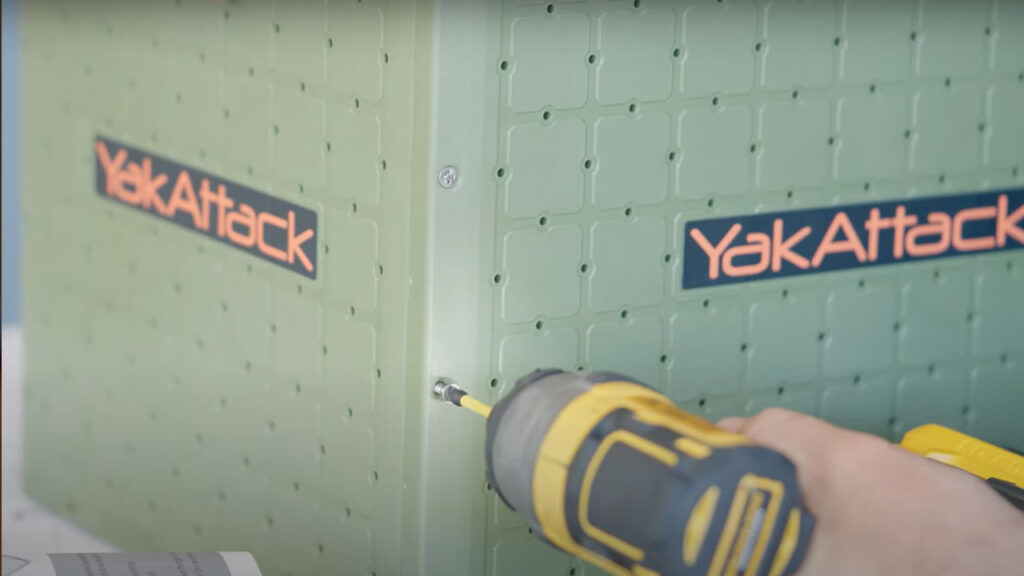
Step 3 – Attach the Second Side Panel
Now I’ll attach the second side panel and start adding some screws to hold everything together.
At this point, you just want to put the four screws up the sides of each panel. For now, hold off on putting the screws in along the bottom.
As clearly stated in the directions, this hardware is in Kit A.
You also want to make sure that the screws are straight and line up properly before you start tightening them down. Again, I'm putting very little pressure on the drill.
Here you can see where the screws come through on the other side.
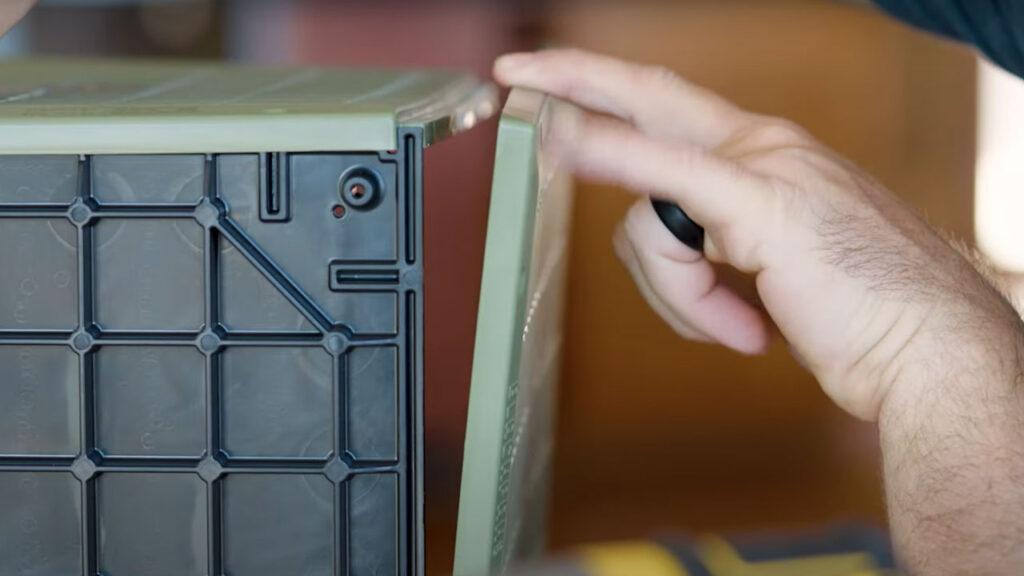
Step 4 – Add the Last Two Side Panels
For Step 4, I’ll just add the next side panel and repeat what I did in the previous step until all the sides are in place.
Just remember to go all the way around before screwing everything together at the bottom. This is important because you may need to manipulate the ends to get everything lined up.
The first few go together pretty easily. However, with the last one you may have to pull the bottom out, line up the pieces, and push everything back together.
Steps 5 and 6 – Install the Side and Bottom Screws
Step 5 is installing the rest of the side screws, and Step 6 is installing the screws around the bottom. Both steps are pretty self explanatory.
It's also worth mentioning that there are three screws on the 13-inch sides and four on the 16-inch sides.
Now I have all four sides and the floor installed and screwed down on my BlackPak Pro.
Step 7 – Install the Rubber Feet
I really like that the BlackPak Pro has rubber feet. They give it tons of grip that will prevent it from sliding around in your boat or vehicle. Trust me, this is a big improvement over the old BlackPaks that didn’t have rubber feet.
In this step I'll use the hardware from Kit B.
I'll put a flat washer into each rubber foot first. Then I'll add the screw.
Next, I’ll line these up on the bottom and go all the way around until all four feet are installed.

Step 8 – Install Rubber Pieces
Now I’ll install the other rubber pieces that were in Kit B. As a reminder, this is the kit I opened in Step 7.
These pieces go on the lid, so I'll grab it on the bottom side.
You’ll see there are little standoffs in four places in the middle of each side. That’s where these pieces go.
They have a wedge shape that aligns with the draft or angle of the box. This makes it easy to get them into the correct position. You just have to place them so they’re oriented in the same way.
Another way to think about it is that there's a standoff on one side that goes toward the bottom of the lid. The angle of this standoff should line up with the angle on each of the rubber pieces.
Then it's just a matter of pushing them into place. They're very simple to install.
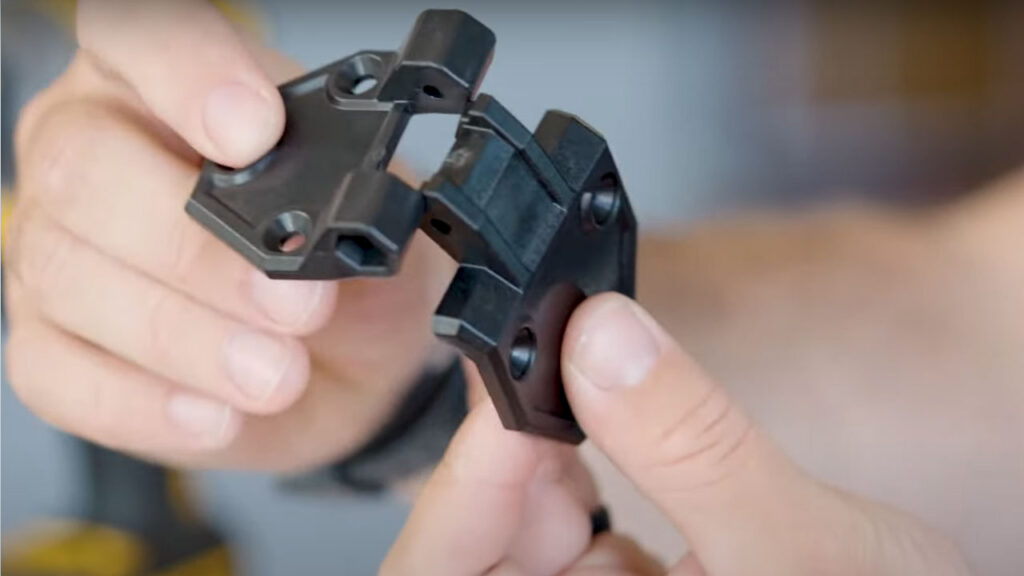
Step 9 – Preassemble the Hinges
To preassemble the hinges I'll use the hardware in Pack C or Kit C.
First I'll dump everything onto the table so I can find the two hinge pieces I'll need.
You'll notice that one side has a recess for the screws while the other side is flat. You want to orient them so that the recess is on the outside of where the hinge is going to be.
Digging through the hardware, you'll find a number 8 by 32, inch-and-three-quarter hinge pin screw. Make sure the hole lines up all the way through both hinge pieces.
The nice thing is that it doesn't matter which side you go through. Also, the lock nut goes into the slot so you don't need an extra tool to hold it in place while you're installing the hinge pin screw.
Just make sure it's engaged into the lock nut so it can't back itself off. The looser it is, the easier it'll be to open and close the box.
I like to put a little friction on it so that when the lid is open it will stay open and not want to fall back down on itself.
Now I'll just repeat this process with the other hinge.
Step 10 – Attach the Hinges to the Lid
Now that I know where I want my hinges, I'm going to put the BlackPak Pro aside and grab the lid.
The longer side is going to go on the top.
And again, you’re just lining up the holes that are already here. The really cool thing about this is that no drilling is required.
For this you'll need the number 10, 1/2-inch screws.
Basically they're the shorter ones in that kit and they have a spaced out thread pattern.
You really want to go slow with these because they thread quickly.
Step 11 – Attach the Latch Points
Before attaching the lid to the BlackPak, I'll attach the latch points on the opposite side from where the hinges are installed.
There are two parts to the latch mechanism. The other part that actually goes on the box is in a separate kit. However, the part you need for this step is in Kit C.
Again, these go opposite from where the hinges are installed. You’ll see that there are pre-drilled holes that allow you to line everything up and install those easily.
They're going to use the same number 10 screws that I used to install the hinges.
The instructions also mention that you can get away with just using one of the latches. There's actually a place in the middle of each side where you can screw just one of the latches down.
That said, I prefer using both latches. It takes a few extra minutes to install both, but it's worth it for the extra security. With two latches your gear is more likely to stay inside the BlackPak if you drop it or if it tips over.
Step 12 – Attach the Lid
In Step 12 I’m going to attach the lid to the box.
It's pretty easy if you're doing one of the 13 x 13-inch or 16 by 16-inch BlackPaks because they’re perfectly square.
The hinges have specific places where they screw in and you're going to use those same 1/2-inch screws.
Also, it's easier to attach the lid if the box is turned on its side.
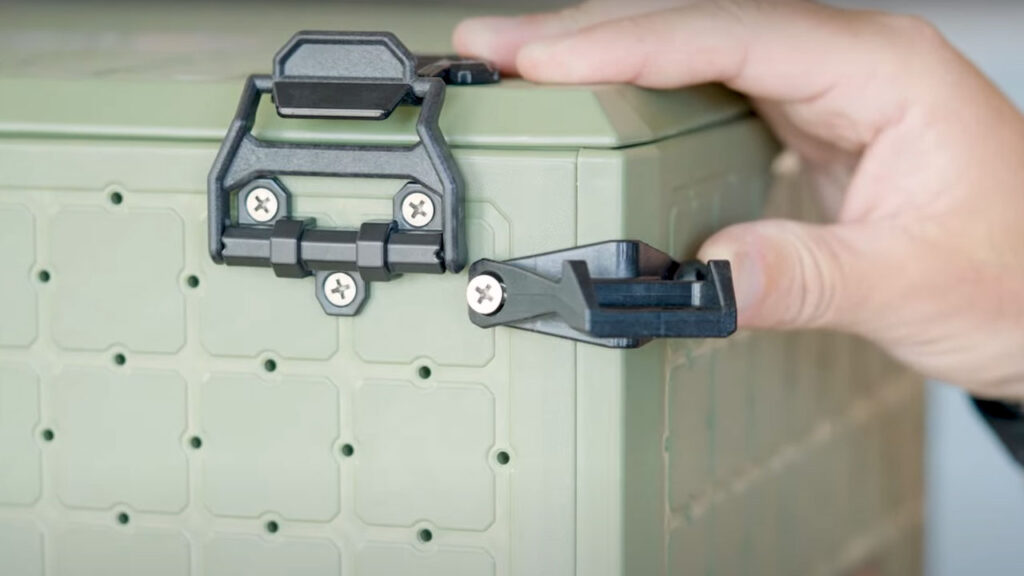
Step 13 – Attach the Latch Clips
The instructions are pretty clear for Step 13 and there are a few images to help.
But just to show you, I'm going to hang the part so you'll see what it’ll look like when the lid is closed and locked.
You're going to take this part and line it up with the screw holes that are already on the pack. You'll be able to see the three holes clearly. They coincide with the three holes in the part you’re attaching.
When you're putting these two parts together they kind of snap into place. If you go in and line those top two screw tabs behind it, then you can push and lock these pieces in.
Then I usually just hang the latch where it's going to go, make sure these holes are lined up, and install the screws in Kit D.
Again, it may be easier to turn the pack on its end so you're doing this from the top instead of the side. But in this instance I’m doing it from the side so it’s easier to see.
Now that I have one installed I can do the second one in the same manner.
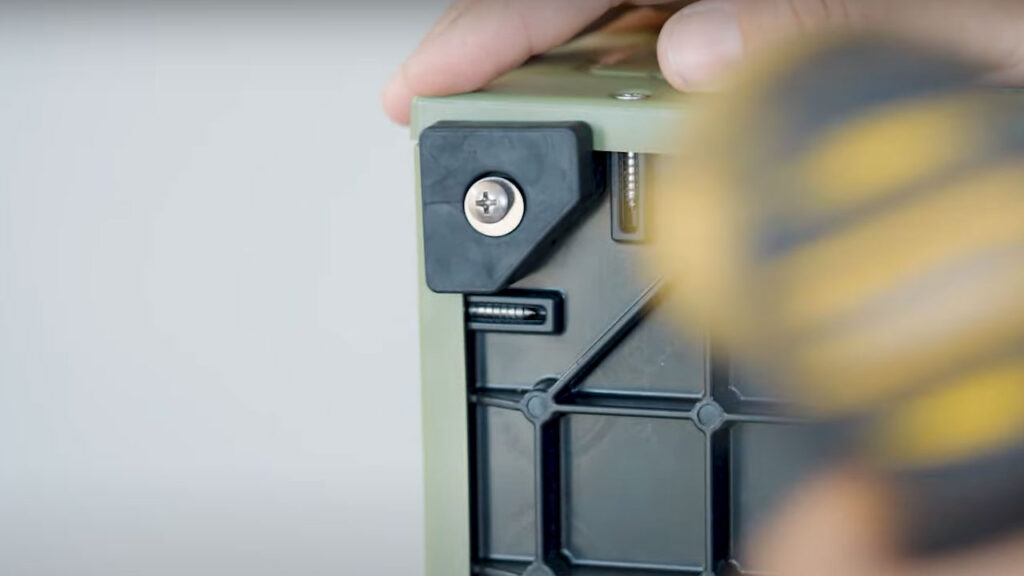
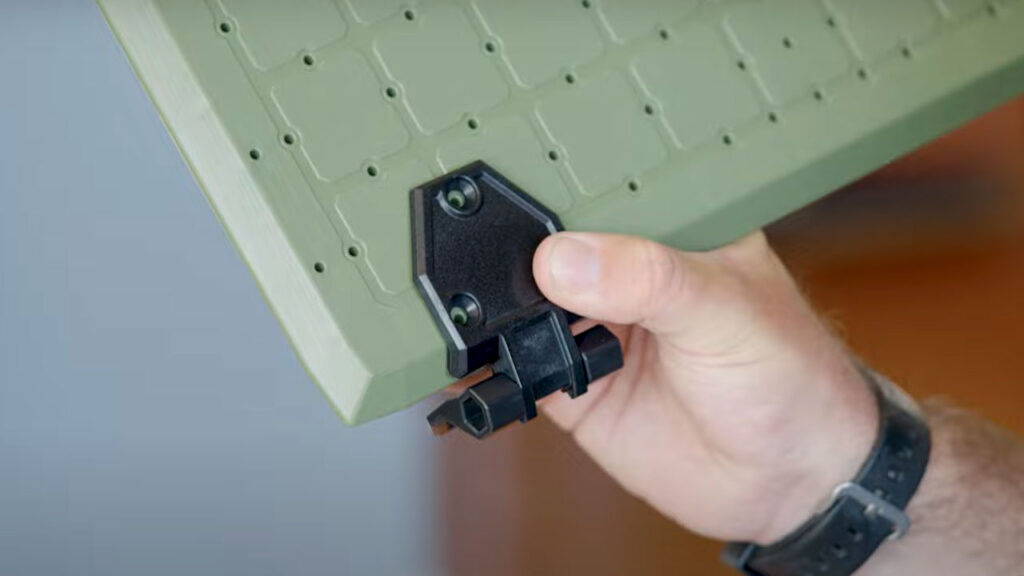
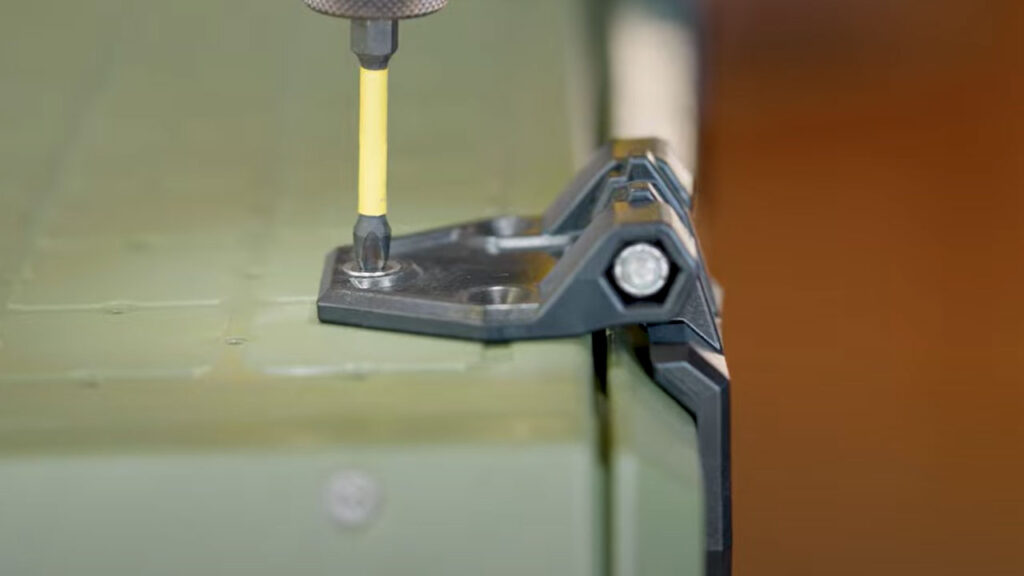
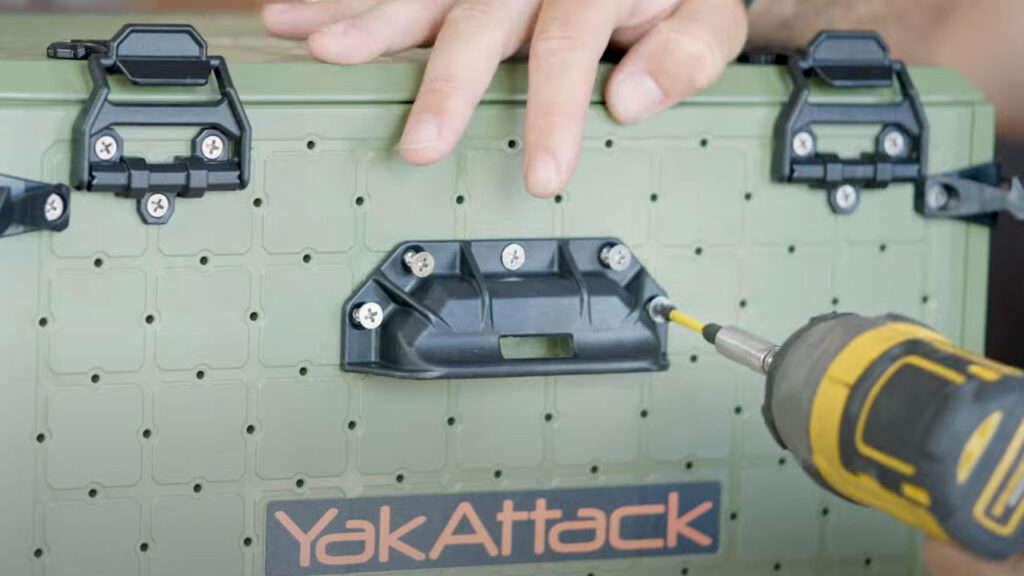
Step 14 – Install the Omni Corner Brackets
Now that the latches are in place, the next step is to install the Omni corner brackets. These are tether or tie down points that allow you to secure the BlackPak in the back of your kayak.
On one of my boats I have it closer and there are tie down points on the handle itself. So I didn't actually use these because I'm just using the handles for securement instead of the corner brackets.
But I’m going to show you how to install those anyway because you may need them with your set up.
On the corners here you'll see two screw holes kind of close to the top. They're going to line right up with the holes on the corner brackets.
Now we need to go back to the parts from Kit C. I’ll be using those 1/2-inch screws again.
Here again, I find it easier to turn the Pak on its side so the parts don't fall off.
Be sure to orient these so the hook is facing up. Now I’ll just repeat this step at each corner.
You can attach the Omni corners in several different locations up and down each corner. But first, you may want to set the Pak in your kayak to get an idea of which position will work best for you.
They can use 1-inch webbing and they also have hooks to attach if you already have bungees installed in your tank well.
You can also utilize the clips that come in the kit.
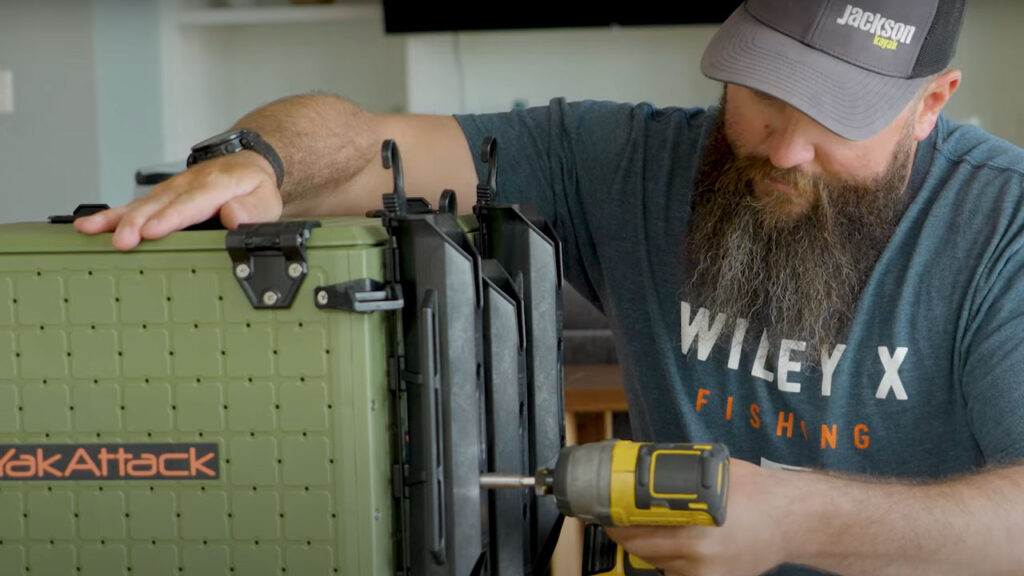
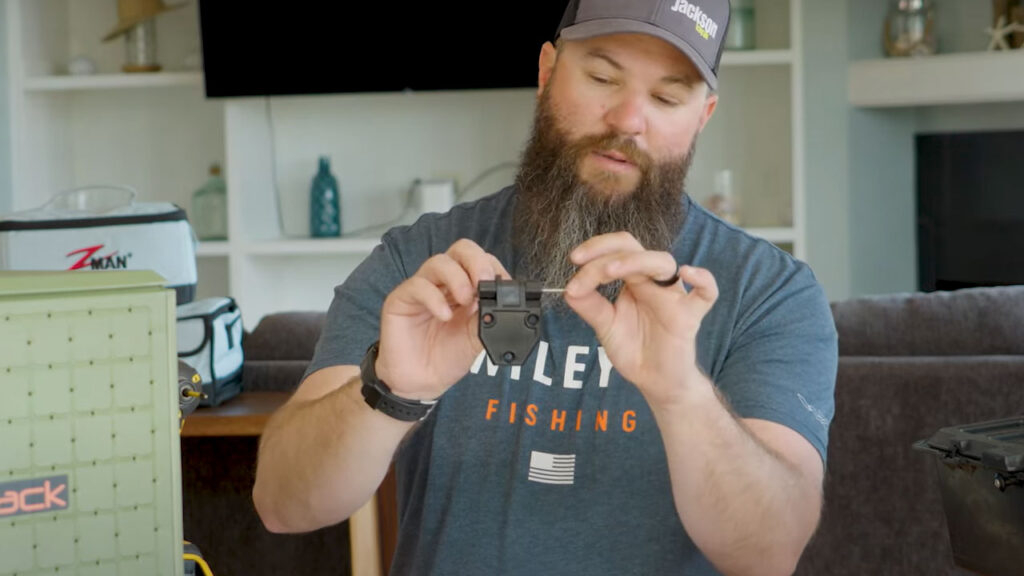
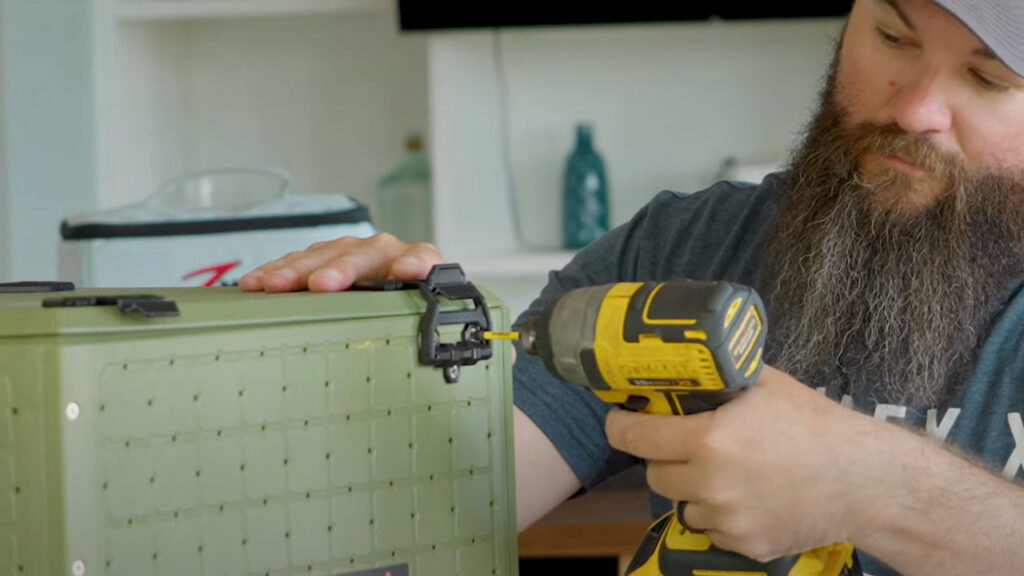
Step 15 – Attach the Tether Tubes
There are tons of options when it comes to tether tube placement. Just keep in mind that where you put the tubes will affect the width of the BlackPak.
If you put the tubes on the side it'll make the whole thing wider. So you may want to check the available space in your tank well first.
In this situation, I'm just going to use three tether tubes because this BlackPak will go in my Jackson Kayak Kilroy. On my Kilroy, the tank is relatively long and narrow.
So I’ll put the tethers on the end to keep the BlackPak as thin as possible. Plus, I really don't take a lot of rods when I fish out of the Kilroy.
To install these I'll use the number 10, 1-inch screws from Kit E.
Now that I’ve decided where to put the rod holders, I'll flip the BlackPak over so I can set them on the top.
To get the maximum distance between each one of these I'm going to offset them. So the middle one will be lower than the two on the ends. Moving the holders as far out as I can will prevent my reels from banging together.
Once you have that top screw lined up the other ones will fall into place.
Now I have the three tether tubes installed.
I really don't need the fourth one, but I’ll keep it handy because I may use it later.
Check the Instructions for Rod Tube Placement Suggestions
Depending on where you end up putting them, you can actually raise or lower the mounting position using the offset screw holes. Just keep in mind that the higher ones will mount the tubes slightly above the lid.
This won't interfere with the lid in any way. Either way, you should probably use the lower screw holes if you don't want your rods sticking up too high.
The only difference is if you have a shorter rod butt it's going to be fine. However, if your rod butt is a little longer, it may actually hit the floor of your kayak. If so, you may want to use the higher mounting holes. This will allow it to engage the slot in the tether tuber, especially with a spinning rod.
Step 16 – Attach the Handles
The final step is attaching the handles.
Again, you can configure them in a number of different ways to suit your needs.
In this example, I'll attach them to either side near the middle. You can go all the way to the top if that's better for you.
Just look for the holes that match up with your desired location, line the handle up, and screw it on using the 1/2-inch screws from Kit C. These are the screws I used for the hinges and four corner pieces.
When done, I'll repeat the process on the other side.
And again, you'll see this gap in the middle which is for 1-inch webbing. You can also utilize the clips that are included. They're called Omni hooks. They were designed to work with the corners but they also work in the handles.
Wrap Up
One huge benefit of the YakAttack BlackPak Pro is that there are so many ways to configure everything. Actually, it can be a little overwhelming. It may help to assemble the box and give it a dry run in your kayak before adding all the accessories.
This will allow you to see where it'll be situated, how you'll tie it down, where the tether tubes should go, and how you'll open and close it from the seat.
Once you have the basics figured out, you can dial everything else in from there.
Now I just need to attach the Omni hooks to the bungee on my kayak. You can also attach the hooks to bungees that you want to add to the kit.
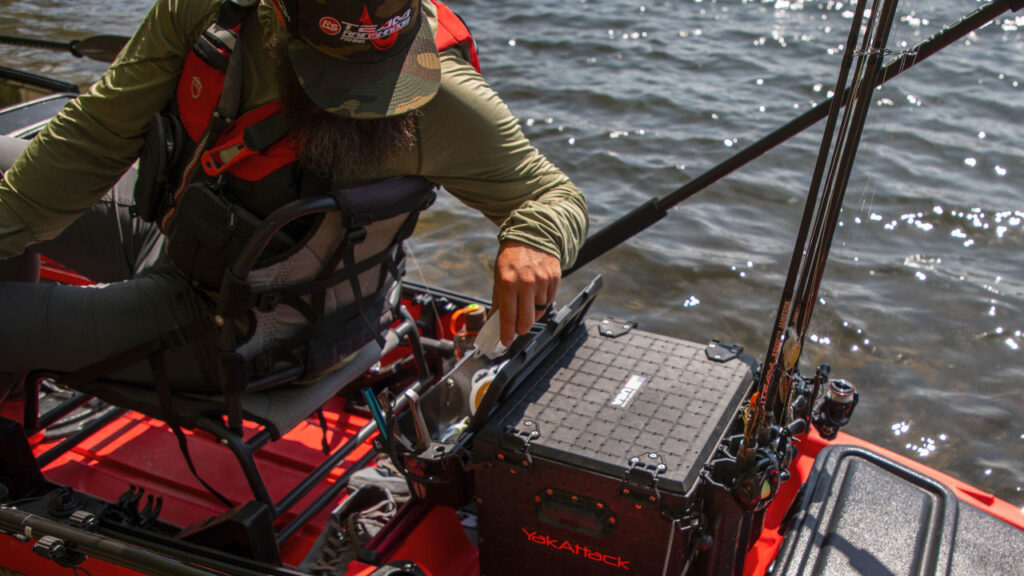
So that's how to unpack and assemble a YakAttack BlackPak Pro in a nutshell. I recently had it set up for redfishing in my latest journal, Freeport Redfish Fishing.
For my full review of the YakAttack BlackPak Pro, be sure to check that out as well on the channel.

Accessories: Yakattack BlackPack Pro


